The Perfect Retro Pineapple Upside-Down Cake: A Classic Worth Reviving
Why This Vintage Dessert Deserves a Modern Revival
In my opinion, pineapple upside-down cake is one of those underappreciated gems that deserves far more attention in today’s baking world. While everyone’s chasing trendy desserts with exotic ingredients, this classic American cake offers something genuinely special: the perfect balance of caramelized fruit, moist cake, and nostalgic charm. I believe it’s particularly appealing to home bakers who want impressive results without overly complicated techniques.
This dessert is ideal for those who appreciate retro flavors and aren’t afraid of a little sweetness. However, if you’re someone who prefers minimalist desserts or avoids canned fruit, this probably isn’t your cup of tea. The combination of brown sugar caramel and maraschino cherries creates an unapologetically sweet profile that I find delightful, though it might overwhelm those with more restrained palates.
Essential Ingredients and Timing
The beauty of this recipe lies in its accessibility. You’ll need about an hour of active time plus cooling, making it perfect for weekend baking projects. The recipe yields twelve generous servings, which I think makes it excellent for family gatherings or potluck contributions.
For the Caramelized Topping
- One cup of packed light brown sugar
- Six tablespoons of unsalted butter
- One tablespoon of vanilla extract
- One teaspoon of kosher salt
- One can of pineapple slices, thoroughly drained
- Eight maraschino cherries, stems removed
For the Cake Base
- Two and a half cups of cake flour
- One tablespoon of baking powder
- One tablespoon of kosher salt
- Quarter teaspoon of ground mace or nutmeg
- Three large eggs at room temperature
- One tablespoon of vanilla extract
- Twelve tablespoons of room temperature butter
- One and a half cups of granulated sugar
- One and a half cups of sour cream
The Step-by-Step Process
What I love most about this technique is how the dramatic flip at the end transforms a simple cake into something spectacular. The process begins with creating a rich caramel base that becomes the cake’s crowning glory.
Creating the Caramel Foundation
Start by preheating your oven to 350 degrees and positioning a 13×9-inch metal baking pan nearby. In a small saucepan, combine the brown sugar, butter, vanilla, and salt over medium heat. Stir occasionally until the butter melts completely and the mixture begins bubbling vigorously, which typically takes about five minutes.
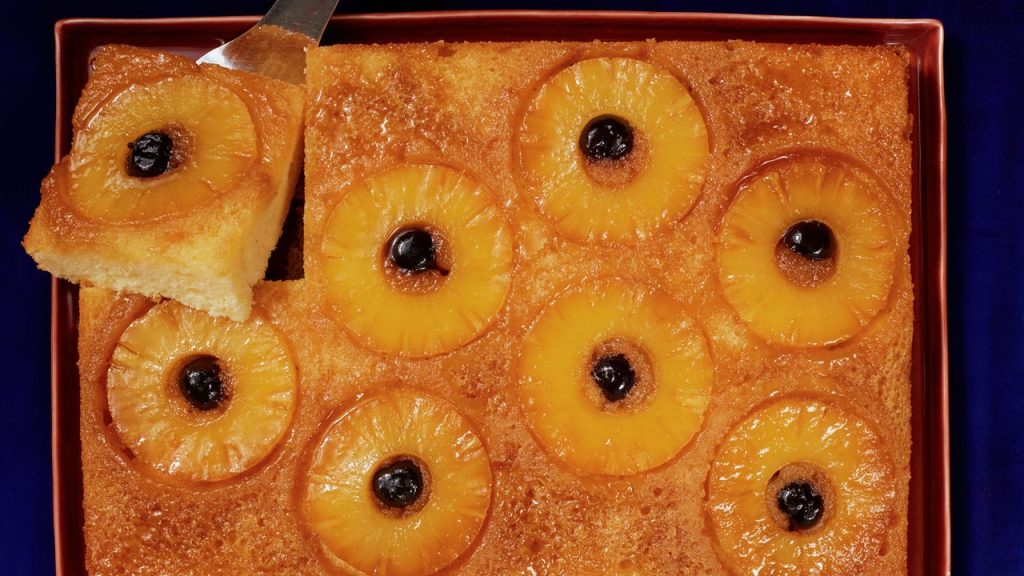
Immediately pour this caramel into your baking pan, using a heat-resistant spatula to spread it evenly across the bottom, ensuring it reaches every corner. Arrange the drained pineapple slices over the caramel without overlapping, then place one cherry in the center of each ring. This creates the iconic pattern that makes the cake so visually striking.
Preparing the Cake Batter
In my experience, the key to a tender cake lies in proper mixing technique. Begin by whisking together the cake flour, baking powder, salt, and mace in a medium bowl. In a separate small bowl, whisk the eggs with vanilla extract.
Using a stand mixer with the paddle attachment, beat the room temperature butter and granulated sugar on medium-high speed until the mixture becomes light and fluffy, approximately four minutes. This step is crucial for achieving the proper texture, so don’t rush it.
Reduce the mixer speed to medium and add the egg mixture in four separate additions, beating for thirty seconds after each addition. Scrape down the bowl regularly to ensure even mixing.
Final Assembly and Baking
Lower the mixer speed and alternate adding the dry ingredients in three additions with the sour cream in two additions, mixing just thirty seconds after each addition. I recommend finishing with a few gentle folds using a clean spatula to ensure everything is well incorporated without overmixing.
Carefully scrape the batter over the arranged fruit in your prepared pan, smoothing the surface gently. Bake for 40 to 50 minutes, until the cake turns golden and a tester inserted in the center comes out clean.
Allow the cake to cool in the pan for exactly fifteen minutes—this timing is critical. Run an offset spatula around the edges to loosen the cake, then place a large serving platter over the pan and flip it over in one confident motion. Gently remove the pan, and if any fruit sticks, simply press it back onto the cake’s surface.
Who This Recipe Really Benefits
I think this cake is perfect for intermediate home bakers who want to impress without mastering complex techniques. It’s also ideal for those hosting casual gatherings where a conversation-starting dessert is more important than refined elegance. The recipe works beautifully for potlucks, family reunions, or any occasion where you need to feed a crowd with something memorable.
However, I wouldn’t recommend this for formal dinner parties or for bakers seeking cutting-edge flavor profiles. The sweetness level and retro aesthetic might not appeal to those preferring sophisticated, less sugary desserts.
The cake stores well for up to three days at room temperature when properly covered, making it excellent for advance preparation. In my opinion, it actually improves slightly after the first day as the flavors meld together.